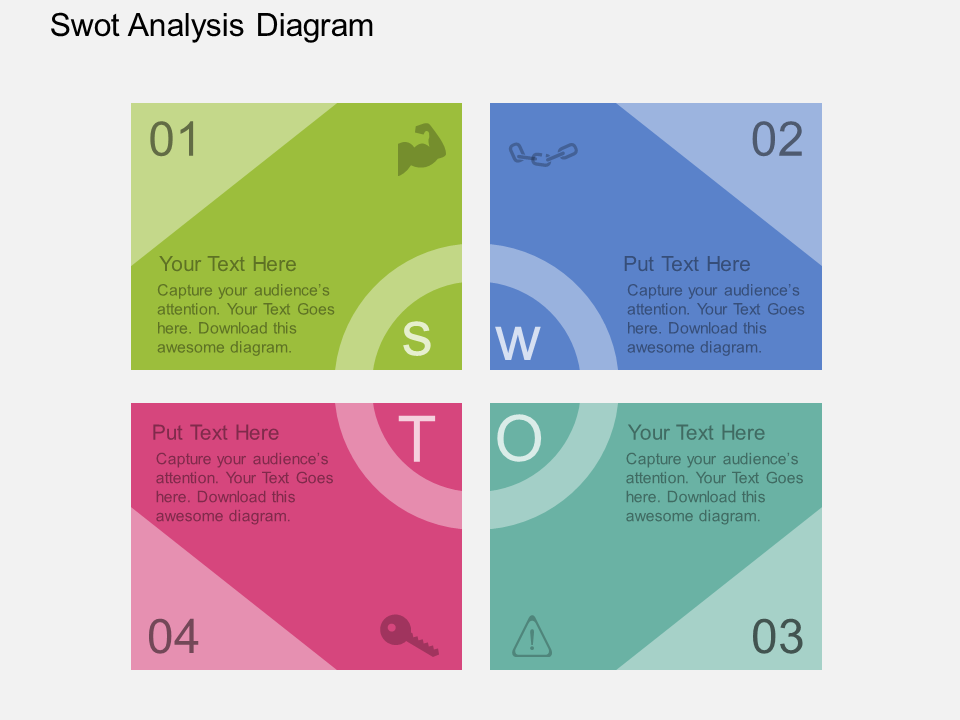
We all are guilty of sometimes having “blinders” on when we are carrying out our business operations or simply working in an organization. We often focus on a part of a situation and not a holistic problem and so we fail to look at the bigger picture.
Luckily enough there are a few tried and tested processes that can help you look at the holistic problem of your organization and not a part of it. Using them, you can easily zoom out and collect some actionable insights that can help in growing and expanding your business. One of the most popular and probably the most useful one is the SWOT analysis.
What is a SWOT analysis?
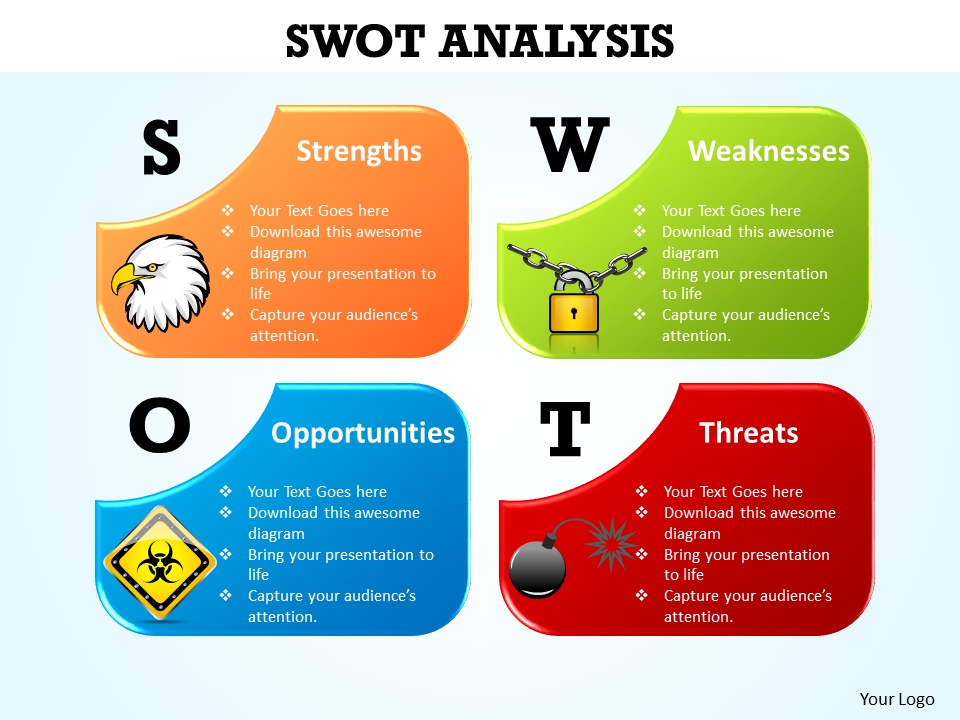
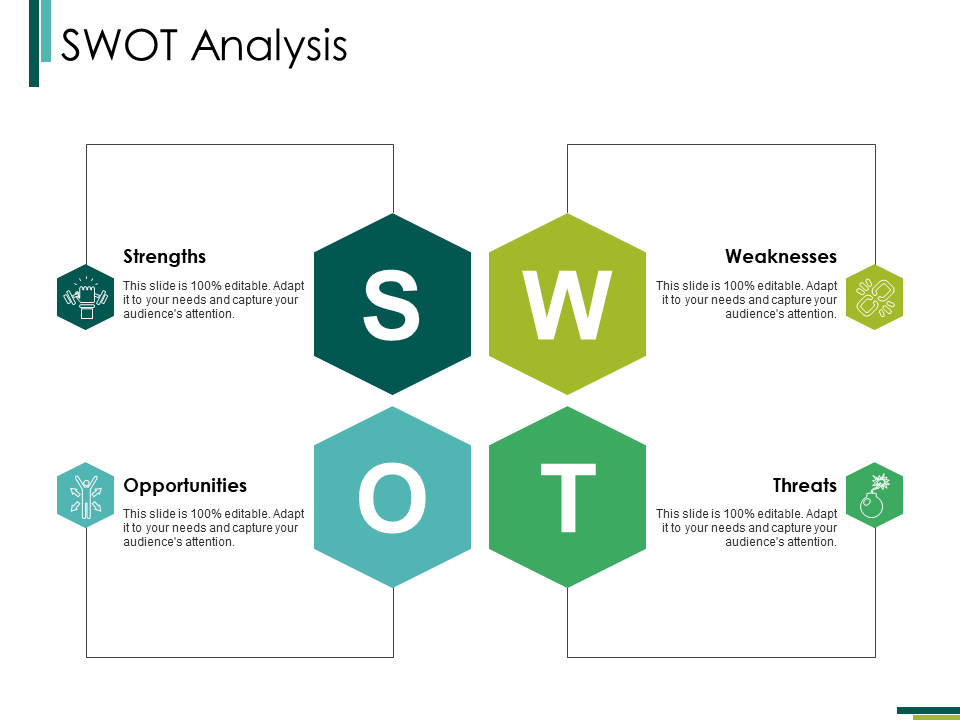
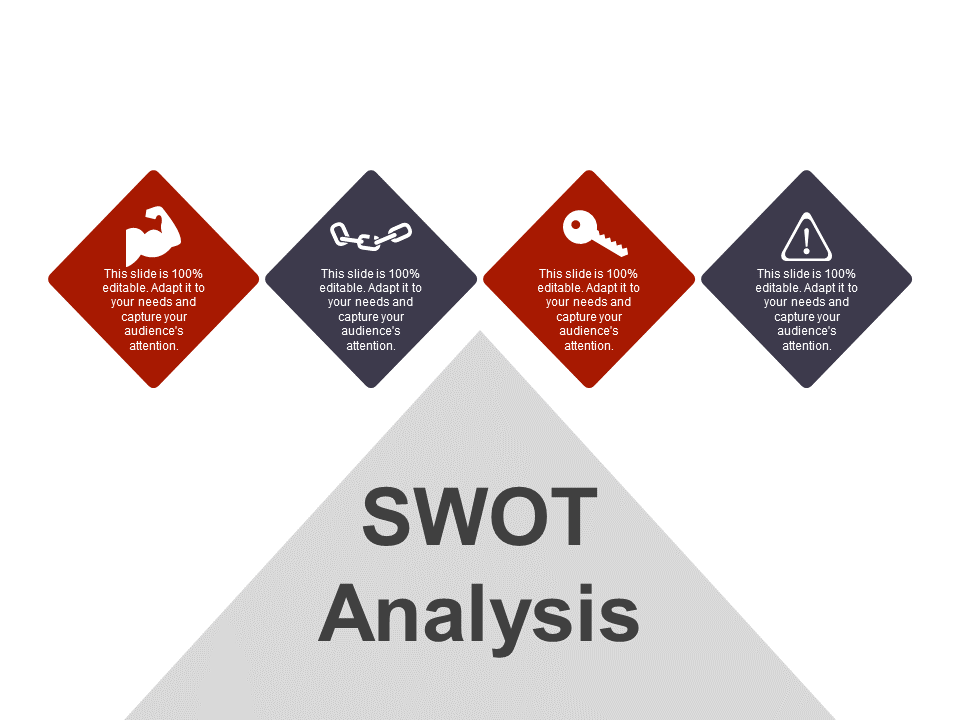
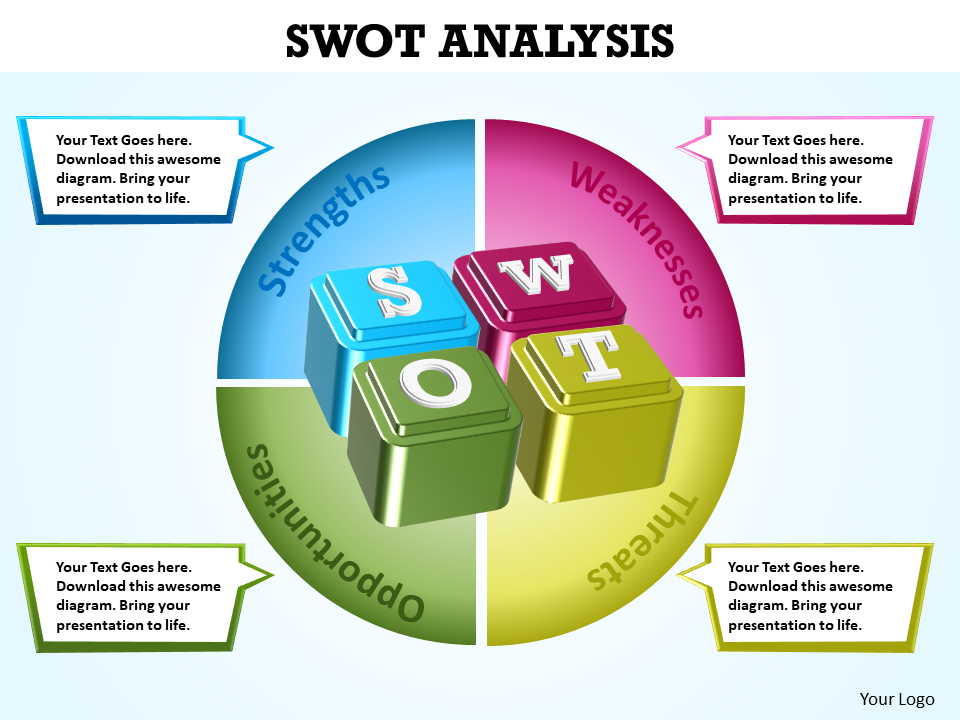
SWOT analysis diagrams are “situational analysis” tools or brainstorming tools that help in planning long term outlooks for the organization. They help in recognizing the strengths, weaknesses, opportunities, and threats - both positive and negative aspects of the business and the way it has been planned. Analyzing all these factors helps in achieving the desired goals and objectives easily.
This tutorial will walk you through the steps of creating all the 4 icons that make up the SWOT analysis. Let us get started!
What you will learn in this tutorial:
STRENGTH ICON:
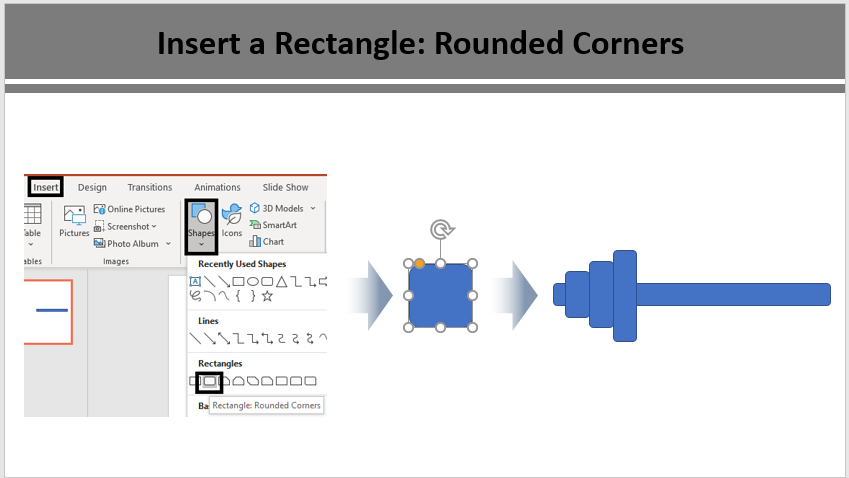
For the strength icon, we have to first insert a rectangle into our slide. To do this:
- Go to the Insert tab and select Shapes. From the Shapes menu, select Rectangle: Rounded Corners and add it to your slide. Elongate the rectangular shape using the adjusting handles as highlighted in the screenshot below:
- Again insert Rectangle: Rounded corners. Adjust its size and shape and position it over the previous elongated rectangle. Also, duplicate the rectangle two times by pressing CNT + D command
Note- The size of all the three rectangles should be smaller in size (see the screenshot below)
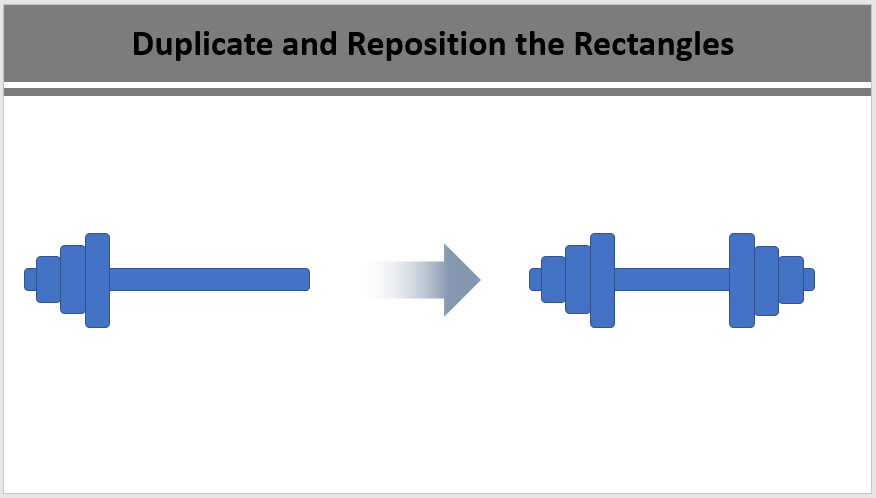
- Duplicate the rectangles and place them on the right side to create the strength icon. Look at the screenshot below for reference
This is the basic structure of the strength icon.
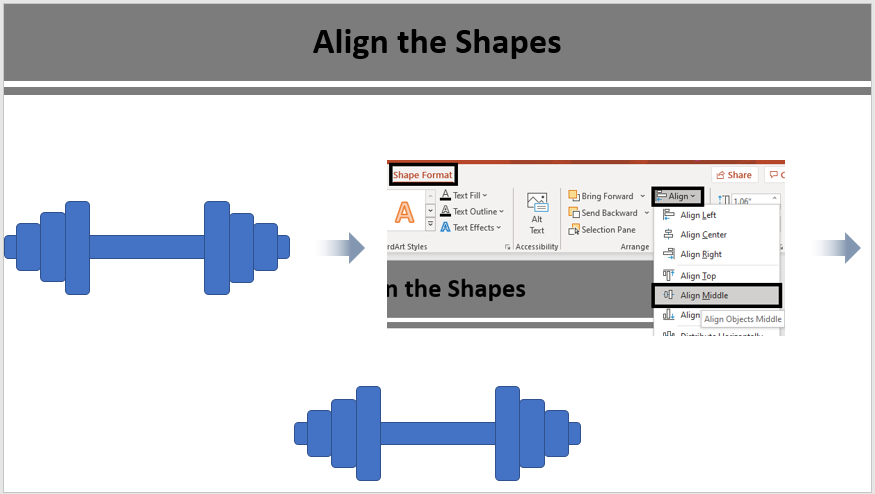
- Select all of the shapes by pressing CNT + A. Then align them together by clicking on Shapes Format> Align> Align Middle.
This will align all the shapes, thus giving you a perfectly structured strength icon like the one shown in the screenshot below:
You can now fill any color in your icon to make it more customized. For this:
- Go to Shape Format> Shape Outline and tick the No Outline checkbox. Then fill color by selecting Shape Fill> color of your choice. For your reference, we have filled our icon with the color “Black”
WEAKNESS ICON:
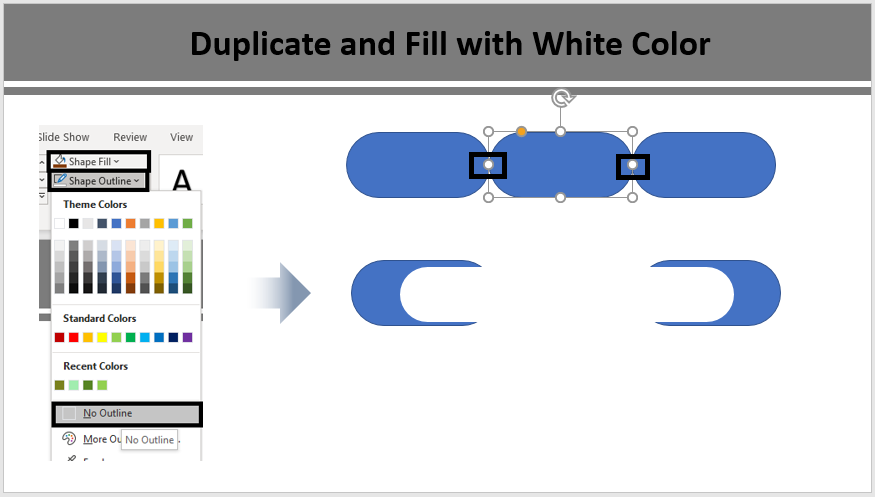
- For the weakness icon, insert a rounded rectangle. To do this go to Insert> Shapes> Rectangle: Rounded Corners. Elongate this rectangle by using the adjusting handles situated at the corners of the shape. Also, make the edges more rounded of the rectangle by using the yellow adjusting handle which is highlighted in the screenshot below:
- To create the basic structure of the weakness icon duplicate the rectangular shape twice by pressing CNT + D command. This will give you three identical rectangles. Right click on the center rectangle and elongate it such that it overlaps the other two. After adjusting the size of this rectangle remove its outline by clicking on Shape Format> Outline> No outline. Also, fill this shape with white color by clicking on Shape Fill (see the screenshot below)
- Insert another rectangle and resize it. For this go to Insert> Shapes> Rectangle. Elongate and resize this rectangle using the adjusting handles. Once that is done duplicate this rectangle two times by pressing on CNT + D command. Now rotate the left-hand side rectangle towards the left side and the right one towards the right side. Reposition these rectangles so that they look exactly like the ones shown in the screenshot below:
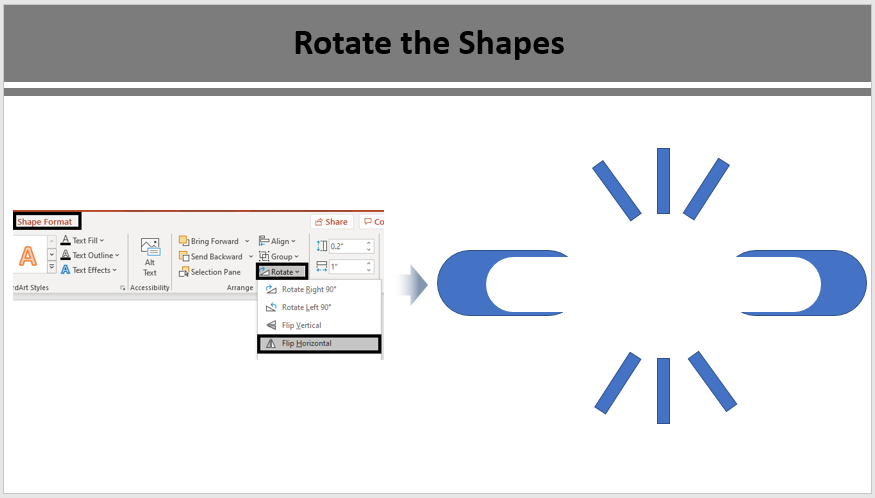
- Select all three rectangles and group them together by using CNT + D command. Then copy and paste these rectangles at the bottom as well and flip them. For this select the shapes and click on Shape Format> Rotate> Flip Horizontal. Then reposition the shapes as shown in the screenshot below:
- Select all the shapes and group them together by using CNT + G command. Them remove the outline by clicking on Shape Format> Outline> No Outline. Once that is done fill color in the shapes by clicking on Shape Format> Shape Fill> Black (or color of your choice)
OPPORTUNITY ICON:
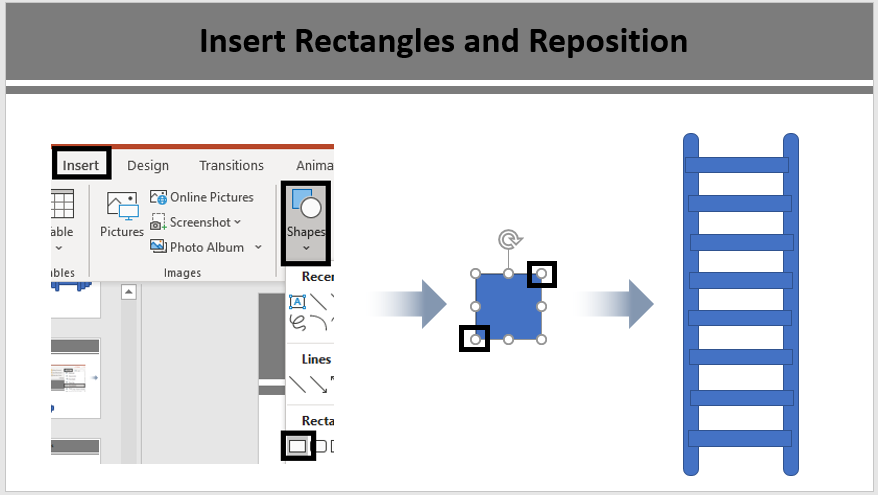
- For the opportunity icon, insert a rounded rectangle. To do this go to Insert> Shapes> Rectangle: Rounded Corners. Elongate this rectangle by using the adjusting handles situated at the corners of the shape. Also, make the pointed edges more rounded by using the yellow adjusting handle which is highlighted in the screenshot below:
- Again insert a rectangle by selecting Shapes> Rectangle. Resize it and duplicate it many times by using CNT + D command. Once that is done reposition these rectangles such that they look like the steps of the ladder (see the screenshot below for reference)
- Select all the shapes and then align them by clicking on Shape Format> Align> Distribute Vertically.
- Color the icon as per your choice. For this first, remove the outline of the shapes by clicking on Shape Format> Shape Outline> No Outline. Then add color by clicking on Shape Format> Shape Fill and select the color of your choice
THREAT ICON:
- Insert an oval shape in your slide by clicking on Insert> Shapes> Oval. Adjust its shape and size as per your preference
- Insert a Rectangle. Adjust its size and place it a little above the circle you inserted before. There should be a gap between the two shapes
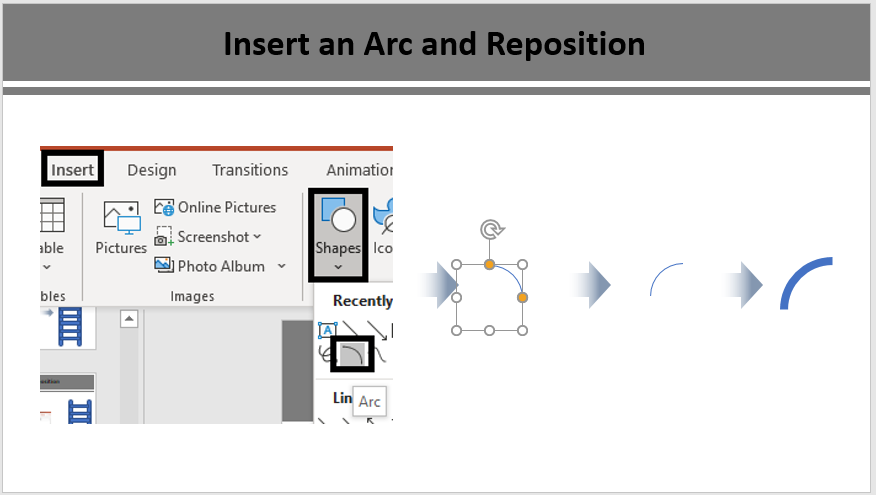
- To create the tail of the threat icon insert an arc and reposition it. For this click on Insert> Shapes> Arc. Rotate this arc shape and enlarge it a bit. Also, increase the width of this arc to as many points as you like (see the image below)
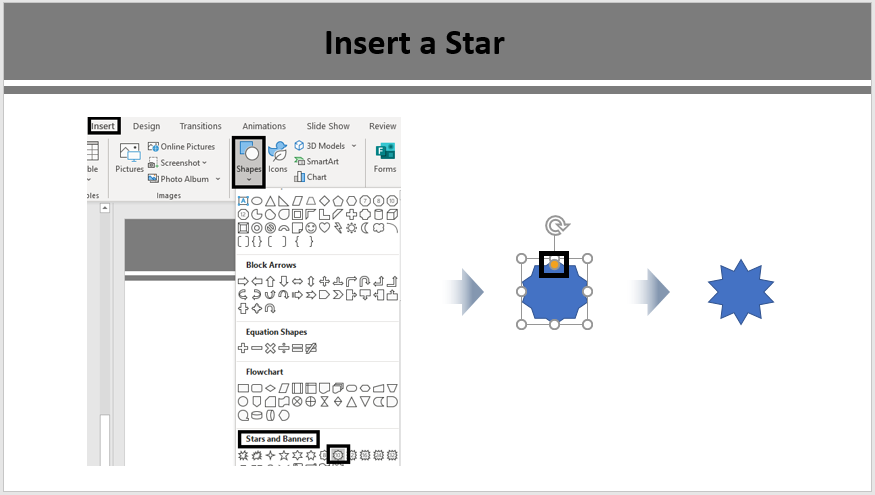
- Next up is to create the cracking effect using stars and banners. For this go to Insert> Shapes> Stars and Banners. A start shape will be inserted in your slide. Adjust its size by using the yellow handle as highlighted in the screenshot below
- Combine all the previously inserted shapes such that they look like the threat icon. Select all these shapes and remove their outline by selecting Shape Format> Outline and No Outline. Once that is done color the shape by again going to Shape Format> Shape Fill. From the dialog box select the color of your choice
Now that we have created all the 4 constituents of the SWOT analysis which are Strength, Weakness, Opportunity, and Threat, let us combine them together.
This is how the final SWOT analysis diagram will look like:
Download these SWOT Analysis Templates
Template #1
Grab this Consulting Diagram SWOT Analysis Strategic Management
Template #2
Click here to download this SWOT Analysis PPT PowerPoint Presentation Ideas Designs
Template #3
Get access to this SWOT Analysis PPT PowerPoint Presentation Infographics Outline
Template #4
Feel free to download this PowerPoint Design Graphic Swot Analysis PPT Template
Template #5
Click here to own this Four Staged Swot Analysis Diagram PowerPoint Template
Select the template that resonates with you and your business needs.
Also, stay tuned for more such exciting tutorials to help you create great presentations!


 Home
Home 


 Customer Reviews

